This information is primarily for administrators and/or people who manage Zylinc solutions
If you need help with your Zylinc solution, you can greatly help the supporters assist you, if you attach log files from your Zylinc system to your support case.
A Zylinc system is typically made up of many different modules, and the log files are often placed in many different folders, depending on your environment, software versions, etc. However, you can use a tool to quickly collect all relevant log files.
This method works for:
- Zylinc desktop client software on Windows computers, such as Attendant Console, Contact Center, and Service Center.
- Zylinc Windows Application Servers.
Use PowerShell to place all log files in a ZIP file on your desktop
- On the Windows computer, open the following script in a new browser tab: Collect Zylinc Logfiles V1.1.txt
- In the new browser tab, press CTRL+A to select all the text in the script, and then press CTRL+C to copy all the script text to your clipboard.
- In the Windows Start menu, Select Windows PowerShell > Windows PowerShell.
- In the blue PowerShell window, press CTRL+V to insert the script text that you copied.
- Press ENTER to run the script.
-
When you see a message: Do you want to place all log files in a ZIP file on your desktop?, click Yes
-
Wait for the script to finish. When done, you will see a message like: The log file collection is now complete. A zip file with the name Logdump 2018-11-26 14-02-47.zip has been placed on your desktop.
-
Upload the zip file as an attachment to the relevant support ticket.
The fact that you make log files available to supporters will greatly help the supporters help you. However, when you make data from your organization available to others, always make sure that you do so in compliance with your organization's IT security policies. If you're in doubt, ask an IT security manager in your organization.
-
Log in to Windows as an administrator.
-
Download Collect Zylinc Logfiles V1.0.zip to the server’s desktop, and extract the zip file.
-
Run Collect Zylinc Logfiles V1.0.bat. This creates a new file on the desktop, with the name Logdump.zip.
-
Upload Logdump.zip as an attachment to the relevant support ticket.
This method works for:
- Zylinc desktop client software on Windows computers, such as Attendant Console, Contact Center, and Service Center.
- Zylinc Windows Application Servers.
To view a list of all Zylinc log files:
- On the Windows computer, open the following script in a new browser tab: Collect Zylinc Logfiles V1.1.txt
- In the new browser tab, press CTRL+A to select all the text in the script, and then press CTRL+C to copy all the script text to your clipboard.
- In the Windows Start menu, Select Windows PowerShell > Windows PowerShell.
- In the blue PowerShell window, press CTRL+V to insert the script text that you copied.
- Press ENTER to run the script.
- When you see a message: Do you want to place all log files in a ZIP file on your desktop?, click No
- When you see a message: Do you want to open and examine the latest log files, click Yes
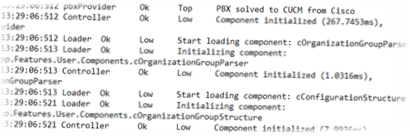
- A window opens. You can now view a list of all log files on that specific computer.
For more information, see Open latest log file from specific Zylinc module.
Zylinc support may ask you to open the latest log file from a specific Zylinc module on a Windows Application Server.
As an administrator, you may also need to open a specific log file when you troubleshoot an installation, or when system documentation instructs you to do so.
To make it easy for you to locate log files, you can use the following PowerShell script, which scans for latest versions of Zylinc log files, and presents a menu with which you can easily open a specific log file.
This method works for:
- Zylinc desktop client software on Windows computers, such as Attendant Console, Contact Center, and Service Center.
- Zylinc Windows Application Servers.
To open the latest log file from specific Zylinc module:
- On the Windows computer, open the following script in a new browser tab: Collect Zylinc Logfiles V1.1.txt
- In the new browser tab, press CTRL+A to select all the text in the script, and then press CTRL+C to copy all the script text to your clipboard.
- In the Windows Start menu, Select Windows PowerShell > Windows PowerShell.
- In the blue PowerShell window, press CTRL+V to insert the script text that you copied.
- Press ENTER to run the script.
-
When you see a message: Do you want to place all log files in a ZIP file on your desktop?, click No
-
When you see a message: Do you want to open and examine the latest log files, click Yes
-
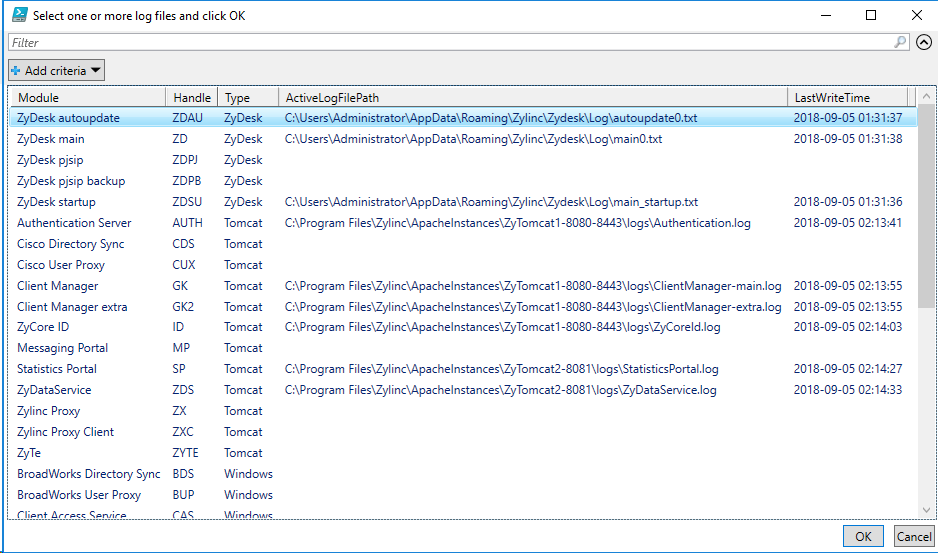
In the window, select one or more log files, and click OK.
-
In the next window, select how you want to open the selected files, and click OK.

You can download various files, including log files, from the Zylinc Media Server, for example:
-
Administration Portal log file Zylinc-admin.log (if the Media Server hosts the portal, which it does by default)
-
Administration Portal transaction log file Zylinc-admin_transactions.log (if the Media Server hosts the portal)
-
Log files from the Tomcat instance on the Media Server
-
Files created if you've used the command system collect info
-
Files created if you've used the command system summary
To download audio files, or make backups of audio files, for example when you upgrade your Media Server, you need to use another procedure, see Back up data and take system down.
- In the Administration Portal menu, select INSTALL > Server Logs
- Click asterisk-logs/ or tomcat-logs/
- Log in as admin with the password for Tomcat instance user admin on the Media Server
- Right-click the log file that you want to download, select Save target as…, and save the log file on your computer
- Open the file in a text editor that supports text files in Unix line feed format, for example, Notepad++
The PowerShell script in the following is useful if you need to batch download the entire directory structure, that contains the log files and other files as described in the previous, from the Media Server to a Windows computer.
The PowerShell script is unsupported. Use it at your own risk.
If you batch download files, or if the files you download are above a certain file size, it can cause high load on the Media Server, which can have a negative impact on ongoing calls. We recommend that you use this script outside production hours or on test environments, education environments, or similar, or during a new installation, before the environment enters production.
Copy the PowerShell code into a new script pane in Windows PowerShell ISE:
-
On the Windows computer in the Windows Start menu, select Windows PowerShell, right-click Windows PowerShell ISE, and select More > Run as administrator
-
In the Windows PowerShell ISE menu, select View, and make sure that Show Script Pane is selected.
-
Make a copy of the following PowerShell code, and in the Windows PowerShell ISE window, right-click inside the Untitled1.ps1 script pane, and select Paste.
Before you run the script, make the following changes to the PowerShell code:
-
In line 1 :
$MediaServer_hostname_or_IPv4 = 'mediaserver.domain.local'
Change mediaserver.domain.local to the hostname or IP address of your Media Server.
-
In line 7:
$MediaServer_Tomcat_password = 'password'
Change password to the password for Tomcat instance user admin on the Media Server.
If you don't want, or you aren't allowed, to store the password, for example, in a PowerShell variable, or as clear text in the script, or in a file that contains the script, change line 7 to:
$MediaServer_Tomcat_password = ''
PowerShell's Get-Credential command will then prompt the user to enter the credentials.
Run the PowerShell script:
-
In the Windows PowerShell ISE window, press F5 to Run Script
In Windows File Explorer, a new folder that contain the downloaded files should open.
If you need to run the script more than once, you can leave the PowerShell ISE window open, and press F5 to run the script again.
When you run the script more than once, only new or changed files will be downloaded. You can use the Reload feature, for example in Notepad++ to automatically reload the file, for example when a log file has been updated.
You can set up this script to automatically download new or changed files, every 15 seconds, until you press CTRL+C.
To do that, specify $true in the following line. To turn the re-download feature off, specify $false
Repeat_until_user_presses_CTRL_C = $false
SIP logging on Zylinc Media Server is useful when you need to solve errors that relate to voice calls from Zylinc queues, or other calls where SIP traffic is routed through Zylinc media server. For example, when somebody calls a voice queue, or when calls from voice queues are routed to agents.
To save resources, SIP logging is normally off.
To turn on SIP logging:
-
Log in to Media Server console (AdminCLI) as admin
-
Type the command asterisk pjsip start
-
Type y, to the prompt: This will enable logging on the Asterisk server. Are you sure you want to continue (y/*)?
The Media server will now include SIP traffic in the Asterisk FULL log file, and the asterisk tail command (see the following) will now also show SIP traffic.
-
In the Administration Portal menu, select INSTALL > Server Logs
-
Click asterisk-logs/
-
Log in as admin with the password for Tomcat instance user admin on Media Server
-
Right-click full and select Save target as… to save the log file on your computer
-
Open the file in a text editor that supports text files in Unix line feed format, for example, Notepad++.
You can inspect the bottom part of a log file in real-time to avoid having to download a new copy of the log file every time new information has been written to the log.
- Log in to Media Server console (AdminCLI) as admin.
- Type the command asterisk tail
Use PowerShell to automatically synchronize Asterisk FULL log to a Windows computer
If you prefer to use a text editor, for example Notepad++, on a Windows computer to work with log files from media server, for example Asterisk FULL log, you can use a PowerShell script to:
• Download Asterisk FULL log to a folder on your Windows computer every time you press F5.
• Download Asterisk FULL log to a folder on your Windows computer, for example, every 15th second, until you press CTRL+C to stop the script.
For information about how to do that, see Use PowerShell to batch download all files from Media Server
This is help for Zylinc version 6.5. To view Zylinc unified help for other versions, go here.
© 2021 Zylinc A/S • Disclaimer
Zylinc unified help is a UK Technical Communication Awards winner 
Help version: 24 February 2021 14:16:14
Share this topic: