![]() Kun slutbruger-hjælpen er for tiden oversat til dansk. Hjælp til installation og administration af Zylinc-løsninger er for tiden på engelsk.
Kun slutbruger-hjælpen er for tiden oversat til dansk. Hjælp til installation og administration af Zylinc-løsninger er for tiden på engelsk.
Dette emne er fortrinsvis for administratorer og/eller folk som bestyrer en Zylinc-løsning

E-mail queues are in many ways similar to queues for phone inquiries (voice queues), they're just simpler.
Compared with voice queues, e-mail queues don't have:
-
Opening hours, and consequently no open/closed or failover settings
-
Caller-rated distribution
-
Caller-rated queueing
-
Queue limits
-
Announcements
Before you can add an e-mail queue, you must set up an e-mail queue interface and a connection to the e-mail account that you want to use for the queue:
-
In the Administration Portal menu, select INSTALL > Portal Configuration
-
Make sure that Mail Queues is selected
-
Click Save
-
In the Administration Portal menu, select SYSTEM > InterfaceConfiguration
-
In Mail Queue Handler Address, enter the address of your Zylinc Windows Application Server
Example: WinAppServer
-
Click Save
-
In the Administration Portal menu, select SYSTEM > Mail Accounts
-
Click Add Mail Account
-
In Name, enter a name for the mail account
In IMAP settings
-
In IMAP Server, specify the address of the server that the Zylinc solution should to retrieve e-mails from.
-
In Port, enter the port number to use for IMAP. The port number is typically 143, or 993 if you use SSL (see next step).
-
If required, select SSL (Secure Sockets Layer, a protocol for transmitting data via the internet in encrypted form).
-
The Sync timer determines how often (in seconds) to check for new e-mails. You typically don't need to specify a sync timer value, because e-mails are delivered real-time as events to the server, but you can specify a sync timer value if the server doesn't support push, or if push isn't allowed in your organization.
-
In User (default), enter the e-mail address and password for the user to use for the e-mail queue.
In SMTP Settings
-
In SMTP Server, specify the address of the server that the Zylinc solution should use when it sends e-mails
-
In Port, enter the port number to use for SMTP. The port number is typically 25 or 465, or 587 if you use SSL (see next step).
-
If required, select SSL
-
In User (default), enter the e-mail address and password for the user to use for the e-mail queue
-
Click Save
-
In the Administration Portal menu, select QUEUES > Mail Queues.
-
At the bottom of the page, click Add Mail Queue.
-
Under Basic Settings, give the queue a Name and (optionally) a Display Name.
Make sure that you give the queue a carefully considered name that you're not likely to change later. If you later change the name of the queue, it can affect your organization's statistics. Also, if you change the name while there are e-mails in the queue, those e-mails may be left unanswered.
Tip from experienced Zylinc administrator: “Use a consistent queue naming scheme. When you're an administrator, that helps you maintain a good overview of your organization's queues. You can always change the queues' display names, if you need them to make more sense to the users.”
-
Then enter the Address of the queue. That's the e-mail address that people should write to in order to reach the queue.
This e-mail address must be unique for the queue.
Optionally, specify a Display Name that'll be used when agents reply to inquiries. That way, you can make e-mails appear to come from, for example, Company X Customer Support instead of the e-mail address.
-
When agents reply to inquiries, the address that you specified in the previous step is by default also used as the sender address in the reply's From and Reply to fields. If required, you can specify a different From Address, Reply-To Address, and Reply-To Bcc. For the latter two, you can also specify an individual Display Name.
-
If required, select a Color Code that agents can use to quickly identify the queue in their clients.
-
Select whether the queue should be a Public Queue or not. If you make the queue public, it'll be visible in all clients that support queues. If you don't make it public, it'll only be visible to agents who subscribe to it.
If you're testing your queue setup, you can hide your test queues by not making them public.
What's the difference between a public queue, a personal queue, and a private queue?

-
In the Connection Settings section, specify information about the mail account that you want to use for the queue:
-
Mail Account: The menu lists the accounts that you've set up under SYSTEM > Mail Accounts. Select the one that you want to use.
-
IMAP User and SMTP User: The user names and passwords to be used to log in to the account to retrieve e-mails (IMAP) and to send e-mails (SMTP).
If you specified IMAP and SMTP information when you set up the connection to the account, the Zylinc solution will use the information from the account if you leave the fields blank in the queue setup.
-
-
In the Call Distribution section, specify how incoming e-mails should be distributed to agents:
-
Distribution: Agents can work in manual mode (where they themselves select the e-mails that they want to handle) or in automatic mode (where e-mails are automatically assigned to them). This setting controls how to distribute e-mails to agents who are in automatic mode:
-
Longest idle: Give next e-mail to the agent who has been idle (that is ready to answer e-mails) for the longest time
-
Round robin: Give e-mails to each agent in circular order, so that all agents take turns, regardless of how long they've been idle
-
-
Weight: The weight of a queue decides the priority with which the Zylinc solution distributes e-mails from a queue to agents who are in automatic mode (where e-mails are automatically assigned to them).
Example: Queue A has a weight of 2, and Queue B has a weight of 6. Both queues have an e-mail that's been waiting for 10 seconds. The e-mail from Queue A will have a total weight of 20 (2×10), and the e-mail from Queue B will have a total weight of 60 (6×10). That means that the e-mail from Queue B will be distributed first.
E-mails in queues with no weight are always served last, regardless of waiting time.
-
Historical Routing: Makes it possible to distribute an e-mail from a given e-mail address to the agent who handled the previous e-mail from that address, provided that the agent is logged-in and active on the queue.
You enable this feature in the On Address field. If you select -default-, it will use the settings defined under CLIENTS > General Settings, in the Queue Default Settings section's Number/Address fields.
You can specify a Limit for how many minutes back in time the system should look for the agent. A limit of 0 means that there's no limit.
With On Mail-Tag, you can distribute replies to e-mails that have already been handled by an agent to the same agent, based on a private/hidden tag in the mail header.
E-mails that are distributed with historical routing take priority over other e-mails that wait in the queue.
-
Standby User - Calls: Standby agents are agents who help out if the situation on the queue gets critical. Specify threshold values for how many e-mails should wait in the queue for standby agents to be activated and deactivated. A value of 0 in the Activate field disables the threshold. If no other agents handle the queue, standby agents are always activated, regardless of this setting.
-
Standby User - Sec: Specify threshold values for how many seconds e-mails must have waited in the queue for standby agents to be activated and deactivated. A value of 0 in the Activate field disables the threshold. If no other agents handle the queue, standby agents are always activated, regardless of this setting.
-
-
In the Threshold Values section, specify settings for acceptable queue length and waiting times:
- Service Goal: The queue's service goal is used to indicate (in clients, on Wallboard, and in statistics) if e-mails in the queue have waited longer than acceptable.
- Warning Level: A threshold for how many e-mails should exceed the service goal before clients display a warning. If you specify 0, clients will not display a warning.
-
In the Timers section, specify how long e-mails should be kept under specific circumstances:
-
Public: The amount of time that e-mails should be kept in the queue after the last agent has logged out of the queue.
-
Private (Moved): The amount of time that e-mails that have been placed in an agent's private queue should be kept in the private queue before being made publicly available to other agents on the queue. An e-mail is typically placed in a private queue if one agent (A) answers the e-mail, and then transfers it to another agent (B). The e-mail will then be in agent B's private queue.
If you select - default -, the Zylinc solution will use the global timers that you can manage under CLIENTS > Global Timers.
-
-
Click Save.
Once you've added a queue and defined its basic settings, you get access to more settings:
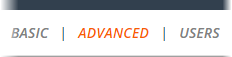
That's a group of Advanced settings about how to look up details about inquirers, and a group of settings called Users about which agents should work on the queue.
If you've set up the lookup feature under SYSTEM > Call-Lookup, the Zylinc solution can automatically look up inquirers in an internal or external database, directory, or phone book, so that agents can view details about inquirers in their clients when they work on the queue.
-
In the Administration Portal menu, select QUEUES > Mail Queues, and click the name of your queue. Then click the ADVANCED link in the top right corner of the page.
-
In the Call Lookup menu, select the lookup configuration that you want to use.
-
If an inquiry has come from another queue, you can choose to use the lookup settings from the original queue if you select Use from Original Queue.
-
Click Save.
This is where you add agents to your queue:
-
In the Administration Portal menu, select QUEUES > Voice Queues, and click the name of your queue. Then click the USERS link in the top right corner of the page.
If you use Internet Explorer on a Windows server, Internet Explorer Enhanced Security Configuration can cause lists of users and groups to take a very long time to load in the Zylinc Administration Portal. While the lists load, you'll see a loading indicator, like this:

If it's allowed in your organization, you should switch off Internet Explorer Enhanced Security Configuration. The way you do that varies depending on your server version. Do a Google search for Internet Explorer Enhanced Security Configuration to learn how to do it on your server version.
Alternatively, you can of course use another browser, for example Chrome or Firefox. -
In the Available section, select required agents, and then use the arrow buttons to move the agents to the Primary, Secondary, Standby, or Owners sections as required.
Note that you can also select groups of people to be agents on a queue. If you've already selected a group, and you get a new colleague who should be an agent on a queue, all you need to do is to make sure that your Active Directory administrator includes the new colleague in the relevant group.
Due to the default synchronization intervals of the four components involved in the user synchronization, it can potentially take up to 198 minutes (3 hours and 18 minutes) before new users added to a group will work in the Zylinc solution. In most cases, however, it'll not take that long. Spørg din Zylinc-administrator, hvis du er i tvivl.
Remember to check the required agents' settings under USERS > Agents in the Administration Portal.
Primary and secondary
When you assign agents to queues, you can define the agents as either primary or secondary for each queue.
Primary and secondary roles are only relevant when agents work in automatic mode, not if agents manually select the inquiries that they want to answer.
Zylinc always considers primary agents first. It'll only consider secondary agents if no primary agents are available.
If an agent becomes available and that agent monitors several queues with waiting inquiries, the inquiry from the queue with the highest priority will be routed to the agent, independently of primary and secondary settings. If several queues have the same priority, then Zylinc selects the queue that hasn’t been attended for the longest time.
If you use skill-based routing (part of the queue's advanced settings), it'll take precedence over these policies.
Standby
If you define agents as standby on a queue, those agents will only get inquiries from that queue, and subsequently answer them, if a certain threshold is reached. You can base the threshold on any combination of:
- Number of inquiries that wait in the queue
- Number of inquiries that have waited in the queue for more than a specified number of seconds
- The fact that no other agents monitor the queue
When standby agents are called into action on a queue, they become primary agents on that queue for as long as their help is required.
If agents are standby on some queues and primary/secondary on other queues, they'll get inquiries from the queues on which they're primary/secondary. Only when the threshold is exceeded, they'll will also get inquiries from the other queues.
As with primary and secondary agents, inquiries will also be prioritized according to queue priority.
What if the queue balances on the threshold?
In Zylinc Contact Center and Service Center agents can themselves select to go in standby mode, in which case they'll go standby on all queues that they subscribe to, regardless of how they've been defined.
Owners
Owners are agents who should be able to
- Change settings about the queue
- View statistics about the queue
even if they're not explicitly defined as Primary, Secondary, or Standby.
If you don't explicitly define one or more owners, everyone who has access to the queue can view information about it.
-
Click Save.
Are you going to create several near-identical e-mail queues?
If so, create the required queues with the minimum settings (typically just a name and an address) and save them.
Then use the Bulk administration of queue settings feature (you find it below the list of queues when you select QUEUES > Mail Queues) to quickly give all the required queues their common settings.
When done, you can then fine-tune each of the queues if they need some individual settings.
Office 365 offers a popular e-mail service. This exercise takes you through the setup of an e-mail queue that gets inquiries from Office 365, and it also covers how to set up the e-mail connection before you set up the queue itself: Set up Office 365 e-mail queue.
Dette er hjælp til Zylinc version 6.5. Du kan vælge hjælp til andre versioner her.
© 2021 Zylinc A/S • Ansvarsfraskrivelse
Zylinc unified help har vundet UK Technical Communication Awards 
Hjælpeversion: 24 februar 2021 15:41:38
Del denne side med andre: